Click on the thumbnail or the title to view a larger image of the slide.
| Thumbnail |
Title and Caption |
|
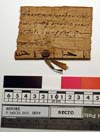
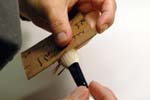
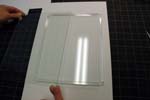
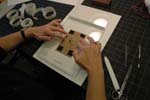
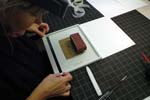
Recto of P.Mich.Inv 1834, a sealed document from sometime after the Arab Conquest of Egypt
This document was written on a piece of recycled papyrus.
The large writing on the verso (image below) and revealed on the
folded/rolled portion of the recto represents earlier usage. The
clay seal is clearly visible, as well as the cords binding the rolled
portion shut. The cords pass through a hole that has been punched
in the body of the document. The photo at left is an important step
in the process of conservation. Photo documentation is an essential
component of conserving these documents, as the original state of
the document will be of interest to future generations of scholars.
Here the document is photographed with a color correction key, a
ruler, a label indicating that this is the recto, and a label identifying
this as a "before" shot. In addition, a document called
a conservation report is created to outline the current condition
of the papyrus and all conservation treatments to be performed.
|
|
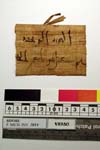
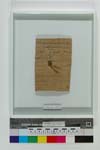
Verso of P.Mich.Inv 1834
The verso of the document is also photographed, with a label indicating that this is the verso. |
|
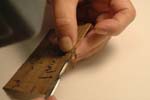
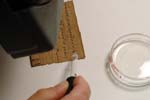
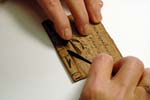
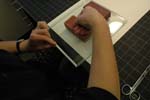
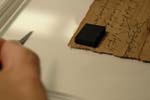
Cutting the binding string with a scalpel
The binding cord is cut on the outside edge of the
rolled/folded edge of the papyrus. This allows the binding cord
to continue to be anchored in the hole that was punched through
the document, and the seal to remain anchored to the document. |
|
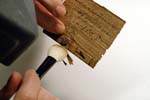
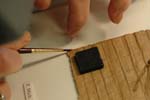
Releasing the seal from the document
The seal is carefully lifted from the papyrus to release the rolled portion. |
|
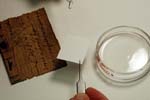
Applying a small drop of water to the document
A small drop of water is applied to the ink to make certain that
the ink is stable. |
|
Using a piece of blotter paper to test the ink
A piece of blotter paper is placed over the wetted area and a lexan block is applied to weigh it down. |
|
Checking the blotter for signs of bleeding
After a few moments the blotter is removed and checked for ink stains.
In this case the blotter is clean. If there were signs of bleeding
extreme caution would need to be exercised in order to avoid getting
the ink wet. |
|
Moistening the outer fold of the rolled portion
Water is applied to the outer edge of the folded portion to allow the brittle fibers to relax so that the document may be unrolled. |
|
More moistening
|
|
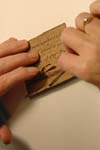
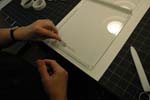
Careful lifting of the first fold
Leyla pulls the seal back with her left hand while using a spatula
to lift the fold. |
|
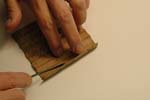
Continued working of the relaxed papyrus
Leyla uses the spatula to encourage the fibers to lie flat. |

|
Moistening the inside fold of the rolled portion
Another fold is moistened to encourage the relaxation of the fibers. |
|
More unfolding
|
|
More moistening
|
|
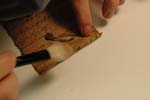
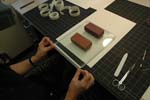
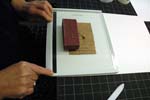
Weights are applied to help the papyrus dry flat
Lead weights wrapped in linen cloth help encourage the papyrus
to dry flat. |
|
The final fold of the papyrus roll is opened
|
|
The papyrus is left alone to dry
|
|
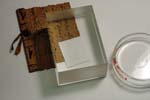
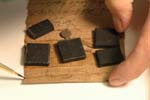
Plexiglas rods are used to create a space for the sealed papyrus between two sheets of glass
1/4 inch by 1/4 inch square profile acrylic rods placed along the
four margins of the glass housing and fixed in place with small
strips of japanese paper and wheat starch paste create a space to
accommodate the seal. |
|
The first strip of linen tape is applied to the topmost edge
This application of tape creates a hinged workspace into which
the papyrus can be mounted and labeled. |
|
A second strip of tape is applied to the topmost edge
The two pieces of tape overlap creating a very durable joint. |
|
A label indicating the inventory number is placed in the housing
Filmoplast tape is used to secure a label to the glass mount. |
|
Placement of the papyrus
The papyrus is centered and weights are used to keep it in place. |
|
Anchoring the papyrus
1 mm wide gummed glassine strips are used to secure the papyrus
to the glass. The glassine strips are coated with a water-soluble
adhesive. Leyla is careful to place the anchoring strips in discreet
areas. |

|
Anchoring
Leyla presses it down slightly with her fingertip to make sure it is attached. |
|
Anchoring
Four or more strips may be used to secure the document. |
|
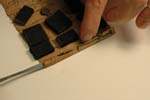
Applying tape to seal the papyrus
With a large weight in place to steady the housing tape is applied to the remaining three sides. |
|
The last piece of tape is applied
The project is complete. |
|
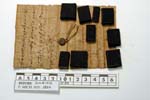
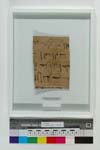
After photo documentation of the recto
Photographs of both the recto and verso are taken to document the new condition of the document. Notice how happy this papyrus looks. |
|
After photo documentation of the verso
|
